If you’re looking to disassemble your trampoline for storage or transport, you’ve come to the right place. In this article, we will guide you through the process of taking apart your trampoline in a few easy steps. We will also provide you with some tips and tricks to make the process as smooth and efficient as possible.
Before You Begin: What You Need to Know
Before disassembling your trampoline, it’s important to gather all the necessary tools and equipment. Here is a list of what you will need:
- Trampoline maintenance manual or user manual (if available)
- Screwdriver set
- Wrench set
- Pliers
- Bolt cutters (if necessary)
- Safety glasses
- Gloves
It’s also important to make sure that your trampoline is completely dry before disassembling it. Water can damage the materials and make them more difficult to work with.
Step 1: Remove the Trampoline Canopy
The first step in disassembling your trampoline is to remove the canopy. This will give you access to the frame and other components that need to be taken apart. To remove the canopy, follow these steps:
- Locate the canopy ropes at each end of the trampoline.
- Pull on the ropes to loosen them and allow the canopy to sag down slightly.
- Reach under the canopy and pull it off the frame. Make sure to remove all the hooks and bolts that secure the canopy in place.
- Set the canopy aside, as you will need it again when reassembling the trampoline.
Step 2: Remove the Trampoline Frame Pads
The next step is to remove the frame pads. These are the soft cushions that cover the metal frame of the trampoline. To remove them, follow these steps:
- Locate the bolts that secure each pad in place.
- Use a screwdriver or wrench to loosen the bolts and remove the pads from the frame.
- Set the pads aside, as you will need them again when reassembling the trampoline.
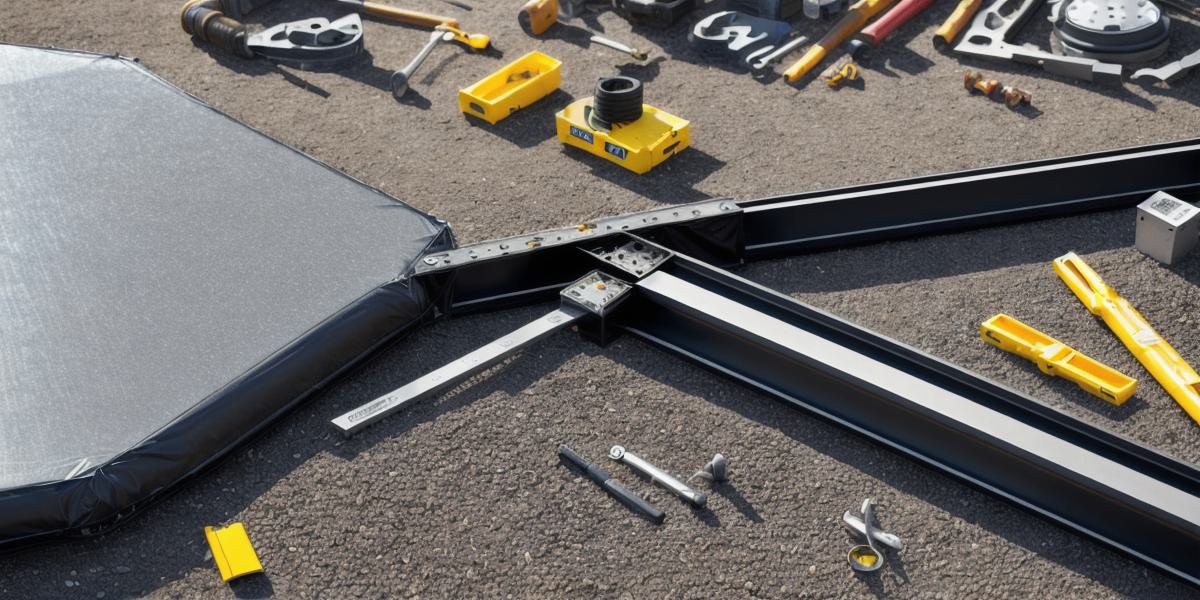
Step 3: Disassemble the Trampoline Frame
Now that you have removed the canopy and frame pads, it’s time to disassemble the trampoline frame. The process will vary depending on the type of trampoline you have. Here are some general steps to follow:
- Locate all the bolts and screws that hold the frame together.
- Use a screwdriver or wrench to loosen the bolts and remove each piece of the frame one by one.
- Be sure to keep track of where each piece belongs, as you will need to put everything back in its original position when reassembling the trampoline.
- Take your time and work methodically, as disassembling the trampoline frame can be a bit overwhelming if you try to do it all at once.
Step 4: Disassemble the Trampoline Spring System
The next step is to disassemble the trampoline spring system. This involves removing the springs and other components that allow the trampoline to bounce. Here are some general steps to follow:
- Locate all the bolts and screws that hold the spring system together.
- Use a screwdriver or wrench to loosen the bolts and remove each piece of the spring system one by one.
- Be sure to keep track of where each piece belongs, as you will need to put everything back in its original position when reassembling the trampoline.
- Take your time and work methodically, as disassembling the trampoline spring system can be a bit overwhelming if you try to do it all at once.
Step 5: Disassemble the Trampoline Safety Net
The final step is to disassemble the trampoline safety net. This involves removing the net poles and other components that hold the net in place. Here are some general steps to follow:
- Locate all the bolts and screws that hold the safety net together.
- Use a screwdriver or wrench to loosen the bolts and remove each piece of the safety net one by one.
- Be sure to keep track of where each piece belongs, as you will need to put everything back in its original position when reassembling the trampoline.
- Take your time and work methodically, as disassembling the trampoline safety net can be a bit overwhelming if you try to do it all at once.
Putting It All Back Together: Reassembling Your Trampoline
Now that you have disassembled your trampoline, it’s time to put everything back together. Here are some general steps to follow:
- Begin by reassembling the trampoline frame. Use the bolts and screws that you removed earlier to secure each piece in its original position.
- Next, reassemble the trampoline spring system. Again, use the bolts and screws that you removed earlier to secure each piece in its original position.
- Reattach the safety net poles and other components that hold the net in place. Use the bolts and screws that you removed earlier to secure everything in its original position.
- Finally, reattach the canopy to the trampoline frame using the hooks and bolts that you removed earlier. Make sure that the canopy is taut and secure.
Tips and Tricks for Disassembling Your Trampoline
Here are some tips and tricks to make the process of disassembling your trampoline as smooth and efficient as possible:
- Take your time and work methodically. Don’t try to do everything at once, as this can be overwhelming and increase the risk of making mistakes.
- Keep track of where each piece belongs. This will help you avoid getting confused and ensure that everything is put back in its original position when reassembling the trampoline.
- Use a screwdriver or wrench to loosen bolts and screws, but be careful not to over-tighten them. Over-tightening can damage the materials and make it more difficult to work with them in the future.
- If you encounter any difficulties or are unsure about how to proceed, consult your trampoline maintenance manual or user manual for guidance.
FAQs
Here are some frequently asked questions about disassembling a trampoline:
Q: Can I leave my trampoline outside all year round?
A: It’s recommended to bring your trampoline inside during the winter months, as exposure to cold weather can damage the materials and make them more difficult to work with.
Q: How often should I clean my trampoline?
A: It’s recommended to clean your trampoline regularly, using a mild detergent and water solution. This will help prevent dirt and grime from building up on the surface of the trampoline.

Q: Can I disassemble my trampoline myself or should I hire a professional?
A: Disassembling a trampoline yourself is generally safe and straightforward, but if you’re unsure about how to proceed or are concerned about damaging the materials, it may be best to hire a professional.
Summary
Disassembling your trampoline can seem like a daunting task, but with some patience and attention to detail, it can be done quickly and easily. By following these general steps and using the tips and tricks outlined above, you’ll be able to put your trampoline away for the winter or move it to a new location with confidence.