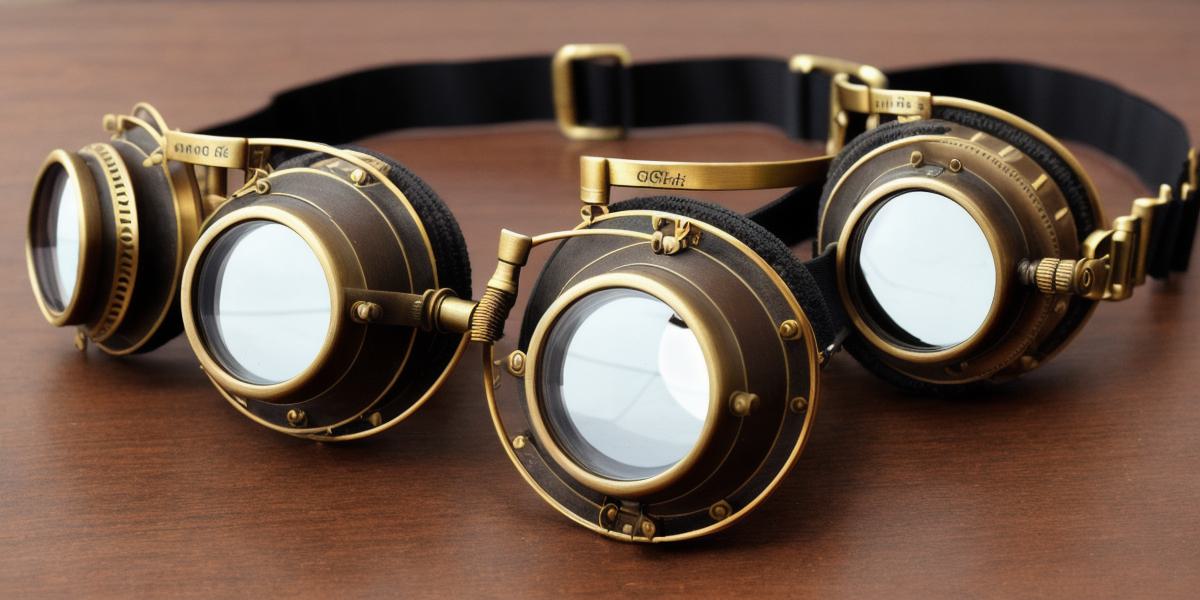
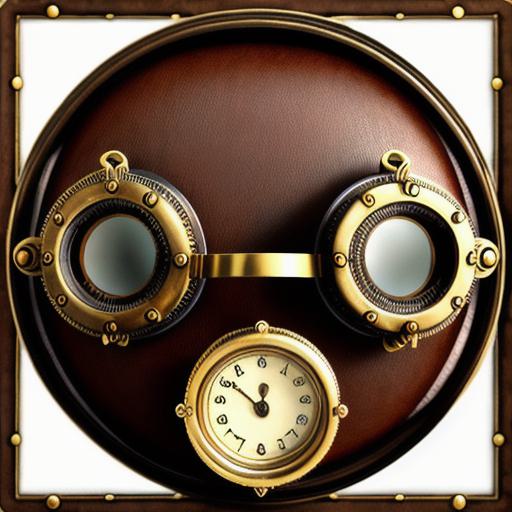
If you’re looking for a unique and creative way to express yourself through art, drawing steampunk goggles can be an excellent choice. Steampunk is a genre of science fiction that combines elements of Victorian-era fashion with mechanical and industrial elements. Goggles are a key component of this style, and with the right tools and techniques, you can create your own set that’s both functional and beautiful.
In this step-by-step guide, we’ll take you through the process of drawing steampunk goggles from scratch. We’ll cover everything from selecting the right materials to adding intricate details that will make your finished product stand out. By the end of this tutorial, you’ll have a set of stunning steampunk goggles that you can be proud of!
Materials Needed
Before we begin, it’s important to gather all the materials you’ll need. Here’s what you’ll need to draw steampunk goggles:
- Sketchbook or drawing paper
- Pencil or charcoal stick
- Kneaded eraser
- White charcoal pencil or white pastel pencil
- Blending stumps or tortillons
- Watercolor brushes (optional)
- Acrylic paint or spray paint (optional)
- Clear coat or varnish (optional)
Sketching the Basic Shape
The first step in drawing steampunk goggles is to sketch out the basic shape. Start by making a circle on your paper using a pencil or charcoal stick. This will be the center of your goggles. Next, draw two lines from the top and bottom of the circle to create the frame. Make sure the lines are evenly spaced and that they connect at the top and bottom of the circle.
Adding Details
Now that you have the basic shape, it’s time to add some details. Start by drawing a small lens on one side of the goggles using a white charcoal pencil or white pastel pencil. Make sure the lens is centered and that it’s roughly the same size as the frame.
Next, draw some small screws and bolts around the frame using a white charcoal pencil or white pastel pencil. Use a blending stump or tortillon to soften the lines and make them look more realistic.
Adding Texture
To give your goggles a steampunk feel, it’s important to add some texture. Start by drawing some small rivets using a white charcoal pencil or white pastel pencil. Use a blending stump or tortillon to soften the lines and make them look more realistic.
Next, draw some small gears or cogs on the sides of the goggles using a white charcoal pencil or white pastel pencil. Again, use a blending stump or tortillon to soften the lines and make them look more realistic.
Finishing Touches
Once you have all the details added, it’s time to add some color. If you want to paint your goggles, start by using acrylic paint or spray paint on a separate piece of paper. Once you’re happy with the colors, carefully apply them to your goggles using a watercolor brush (optional).
If you prefer to leave your goggles in black and white, that’s perfectly fine too! Simply use a white charcoal pencil or white pastel pencil to add some highlights and shadows to your drawing.
Finally, once you’re happy with your finished product, apply a clear coat or varnish (optional) to protect your goggles from moisture and damage.
FAQs
- Can I use other materials besides paper and pencils to draw steampunk goggles? Yes, you can use any surface that allows you to draw with a pencil, such as canvas or sketchbook paper.